
More technical doubts. Last year when I was making this dress, I spent a long time reading and trying to make sense of the lining instructions. I just couldn´t visualize the "how to". In the end I did it the best I could but cheating a lot. If you are new to lining and you are in the same situation I was then, this post is for you. I´m going to follow Burda´s lining instructions step by step.
Primero preparar tela y forro y ponerle cinta moldeable de fliselina. ¿Vosotras habeis encontrado alguna mercería que os la venda? ¿Y como hay que pedirla, porque con ese nombre aqui no la conocen? En fín como yo de eso no tengo le he cortado unas tiras de entretela al bies para poder moldearla mejor.
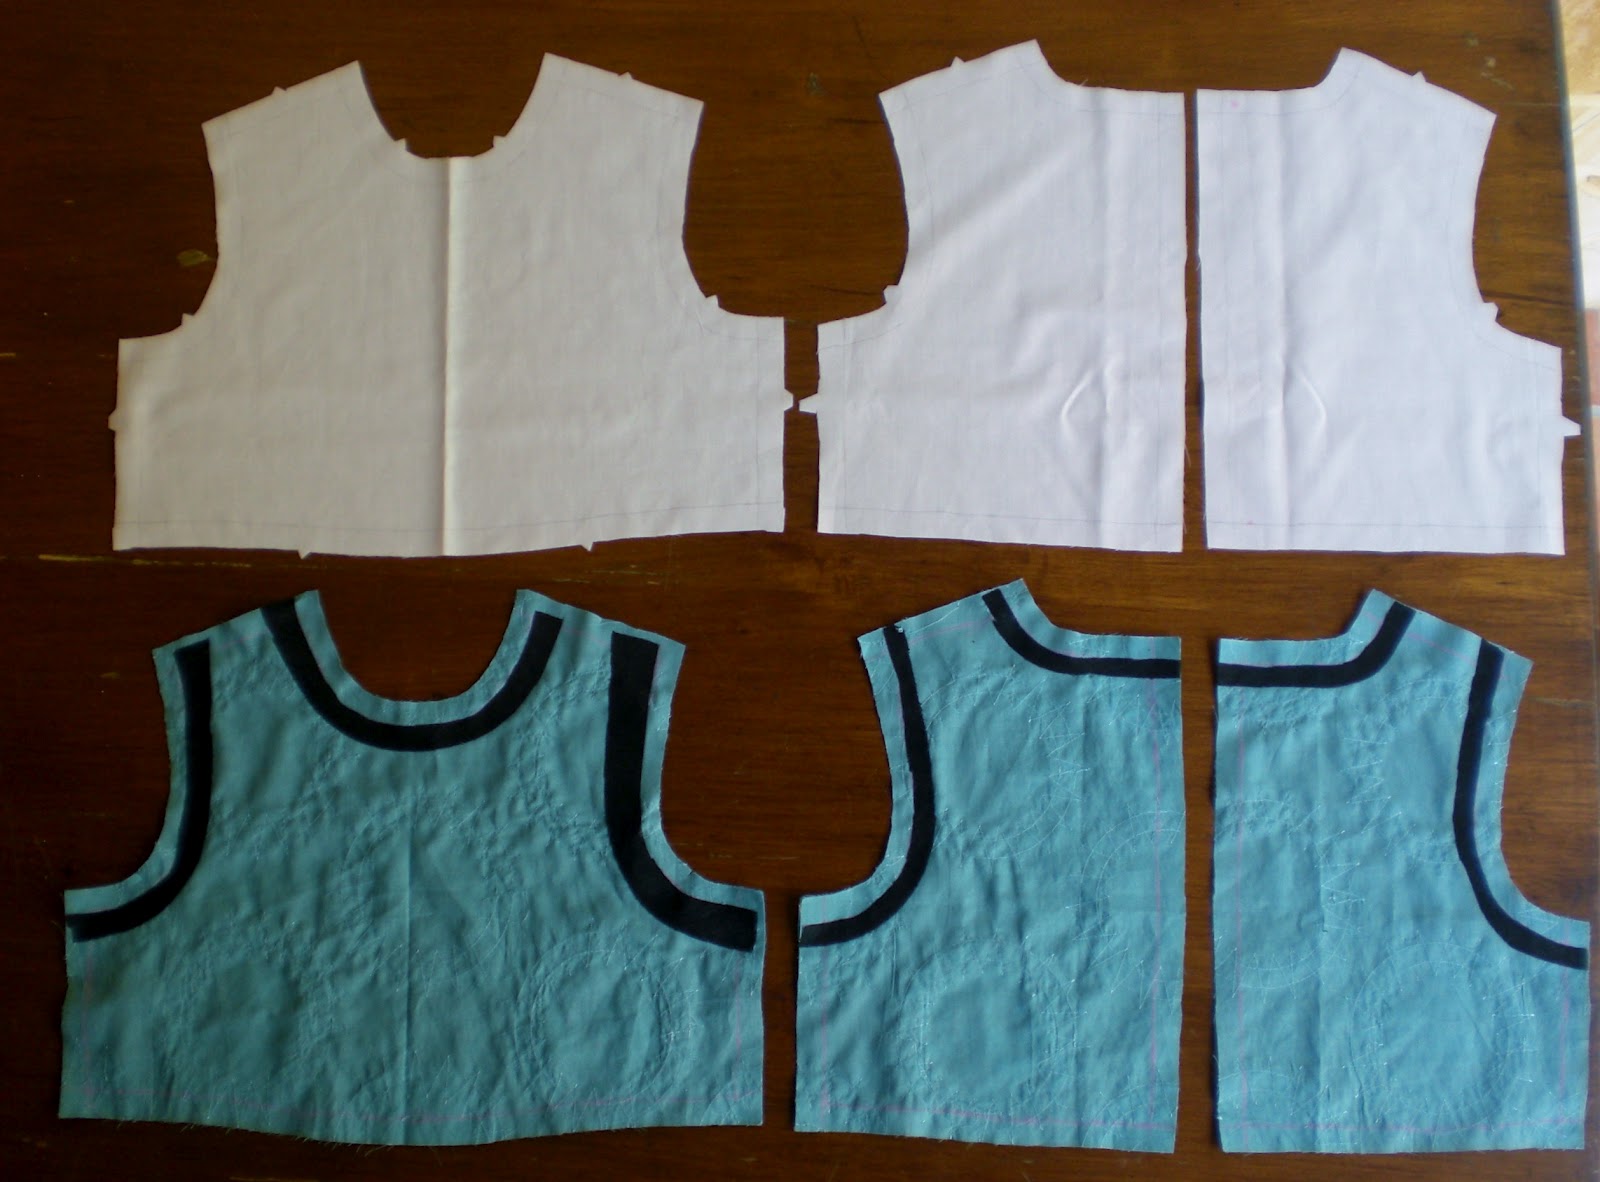
First thing, prepare the fabric and lining. Here, I´m using some strips of interfacing cut on the bias to give stability to the neck and armholes
 |
| Negra. No tenia otra. |
Burda tells you to put the facings with the front and back pieces and sew along the neckline and arm holes always finishing 0.8 inches shy of the shoulder sewing line
1- Marca 2 cm en las piezas, para no pasarlas
Mark the 0.8 inches to make sure you stop there

2 - Prende el la pieza del frente con el forro del frente, encarando los derechos, y cose sin sobrepasar la marca. Hazlo igual con la/las espaldas.
Right sides together pin the front bodice and front lining and stitch. Same thing with the back/s and back lining.

3- Ahora recorta márgenes de costura y haz piquetes en las zonas redondeadas muy cerca del pespunte, pero sin cortar!
Now trim seam allowances and make some cuts, specially in the round areas, very near the stitch.

4- Damos la vuelta al delantero. SOLO el delantero y lo planchamos (eso no lo dice Burda, pero yo lo plancho todo)
Turn the front bodice right sides out and iron it (by Burda you don´t iron at this point)

Now we place the front shoulder openings inside the back openings and align the linings and the main fabric.


We stitch now linings and main frabric separately.

To iron seams open, pull the front bodice through the back bodice, place a wooden spoon handle. I´d trim these seam allowances too.

We pull the front further through the shoulder hole , to close those 1.6 inches we left open at the begining.


9- Ahora ya damos la vuelta a las partes de atras y planchamos.
We turn the back bodice parts to the outside and iron the whole thing

10- Cerramos los lados. Ya queda poco,¡Animo! Levantamos las telas exteriores de ambos lados y alineamos exteriores y forro, cosiendolo todo seguido.
Now we are closing the sides. Lift outside fabrics on both sides and align these and the linings too, sewing them in one continuos seam.

11- Abre las costuras con la plancha, baja la tela exterior y ya está listo para unirle a la falda, poner cremallera o el cierre que tu quieras.
Iron the seams open, take the outside fabric down and your bodice is ready to attach the skirt, the zipper or whatever it is that you want to do now.


Espero que a mi amiga Sonia le haya gustado.
Hasta pronto!
See you soon!